Key takeaways
- Bloom = wet the grounds and pause so trapped CO₂ can escape, helping water soak the coffee more evenly.
- For most pour overs, start with 2–3× bloom water for 30–45 seconds, then adjust based on freshness, roast level, and grind.
If you searched coffee bloom explained, you’re probably trying to fix pour over that tastes different every time. That’s normal. The bloom is a small step, but it can change how evenly your coffee brews.
In this guide, you’ll learn what the bloom is, why it matters, and how to do it in a simple way. The goal is better taste, more consistency, and less wasted coffee.

Quick answer: coffee bloom explained
Bloom is the short wetting step at the start of brewing. It helps release trapped carbon dioxide (CO₂) so water can soak the coffee evenly and extract more evenly.
A safe starting point: use bloom water equal to 2–3× your coffee weight, wait 30–45 seconds, then continue pouring.
Need a Few Simple Tools for Better Home Brewing?
Browse practical Amazon Basics coffee and kitchen gear for grinding, brewing, storing, and setting up your everyday coffee corner.
Paid link. As an Amazon Associate we earn from qualifying purchases.
Results change with freshness, roast level, grind size, water temperature, and dripper shape.
What is the coffee bloom?
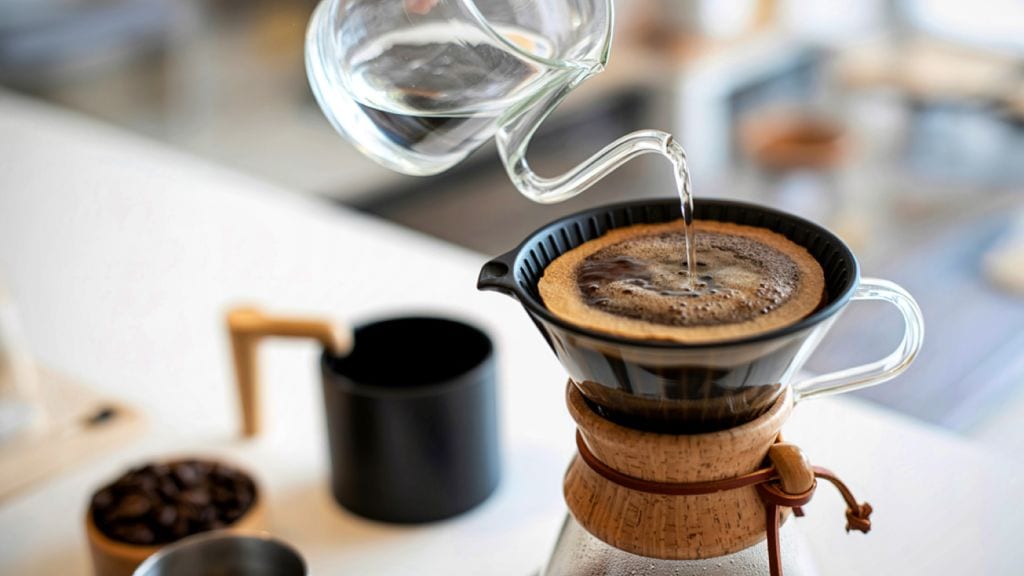
Bloom (a short wetting step that releases trapped gas) happens when hot water first touches dry coffee grounds.
Those bubbles are mostly CO₂ (carbon dioxide gas) leaving the grounds. Coffee makes and traps gas during roasting, and that gas keeps escaping after roasting (this is called degassing, meaning “gas leaving the bean over time”).


Why bloom helps your pour over taste better
It helps the coffee bed get wet evenly
CO₂ can push water away. That can leave dry pockets. Blooming helps you wet all the grounds early.
It can reduce uneven brewing
Uneven wetting can lead to uneven extraction (how much flavor you pull from coffee). Blooming helps set up a more even flow.
It gives you a quick freshness clue
Fresher coffee often bubbles more because it still has more CO₂ to release. Also, heat can speed up degassing over time (one reason storage matters).

How bloom fits into a full pour over
Think of pour over like this:
- Bloom (wet the grounds + let gas escape)
- Main pours (add the rest of the water in slow pours)
- Drawdown (let water finish dripping)
If your bloom is uneven, your main pours may run through “easy paths.” That can make the cup taste sharp, thin, or harsh. (Channels = small paths where water rushes through.)
How much water and time for blooming coffee?
A strong beginner range is:
- Bloom water: 2–3× the coffee weight (example: 15 g coffee → 30–45 g water)
- Bloom time: 30–45 seconds
Easy adjustment rules
- Very fresh coffee (lots of bubbles): try 45–60 seconds.
- Older coffee (few bubbles): 20–35 seconds is often enough.

Comparison table: quick bloom settings by roast level
| Roast level | What you may see | Bloom water | Bloom time | Simple tip |
|---|---|---|---|---|
| Light | Smaller bubbles, slower | 3× | 45–60s | Often needs more time to soak. |
| Medium | Steady bubbling | 2–3× | 30–45s | Good default. |
| Dark | Big bubbles fast | 2× | 20–35s | Often extracts fast; keep it gentle. |
Step-by-step: an easy bloom for pour over
What you need
Dripper + filter, kettle, coffee, timer, mug/server. A scale helps (but you can do it without one).
Steps
- Rinse the paper filter.
This removes paper taste and warms the brewer. - Add coffee and level the bed.
Start with 15 g coffee for one mug (adjust later). - Start timer. Pour bloom water slowly.
Pour 30–45 g water (2–3× coffee weight). - Make sure all grounds get wet.
Look for dry spots. If you see any, add a small splash. You can do a gentle swirl. - Wait 30–45 seconds.
- Continue your main pours.
Pour slowly in circles. Try to keep the bed flat.

If you don’t have tools…
No scale
- Use a “good enough” starter: 1 heaping tablespoon of coffee per ~120–150 ml water.
- For bloom, add water just until all grounds are wet and look like thick mud (no dry patches).
- Warning: this is less accurate, so taste may change more from day to day.
No thermometer
Many coffee standards and testing protocols use brew water around 92–96°C for filter brewing.
At home, a simple cue is: boil water, then rest 30–60 seconds before pouring (your kettle and room temp can change this).
No grinder
Ask a café to grind for pour over / V60 (medium-fine).
If using pre-ground, focus on a careful bloom and slow pours to improve even wetting.


Common mistakes
- Skipping bloom → Do this instead: bloom 30–45s with 2–3× water.
- Dry spots during bloom → Do this instead: pour slower and cover the whole bed; use a gentle swirl.
- Pouring too hard → Do this instead: use a gentle pour to avoid pushing holes in the bed.
- Too much bloom water (flooding the brewer) → Do this instead: stay near 2–3× and continue pouring on time.
- Blooming too short on very fresh coffee → Do this instead: extend toward 45–60s if bubbles keep going.
- Over-stirring → Do this instead: one gentle swirl is enough; too much mixing can change flow.
- Ignoring storage → Do this instead: keep coffee away from heat, moisture, and oxygen to slow staling and gas loss.
If your coffee tastes…
| If it tastes… | Likely causes | Do this instead (quick fixes) |
|---|---|---|
| Bitter | Grind too fine (water moves too slow) • Too much swirling/stirring (agitation = how much you move the coffee bed) • Brew runs too long | Grind a bit coarser • Swirl less (one gentle swirl max) • Shorten total brew time |
| Sour | Under-extraction (too little flavor pulled) • Dry spots during bloom • Brew runs too fast | Make bloom even (no dry spots) • Grind a bit finer • Pour slower |
| Weak / watery | Too little coffee for the water • Grind too coarse • Very fast pour | Use more coffee or less water • Grind slightly finer • Slow the pour |
| Harsh / astringent | Uneven flow (channels = small paths where water rushes through) • Too much stirring/swirl | Pour gently • Stir less • Focus on an even bloom (fully wet the bed) |
Gear that can help
If you want fewer “random” cups, these tools can help:
- Gooseneck kettle: If you struggle to wet all grounds evenly, a gooseneck gives better pour control.
- Scale: If your cups change day to day, a scale helps you repeat the same bloom water and brew ratio.
- Grinder: If you switch beans often, a grinder helps you adjust grind size (a big taste lever).
- Filters that match your dripper: If drawdown is messy, the right filter helps steady flow.
Next steps
- If you’re still deciding which brew style fits your routine, compare methods here: French Press vs Pour Over
- If you want better results even without a scale, use these simple measuring shortcuts: How to Make Pour Over Coffee Without a Scale
- If your coffee tastes too weak, too strong, or inconsistent, lock in a repeatable recipe with a ratio: Ratio for Pour Over Coffee
- If you want a quick, no-guess starting recipe for any bean, calculate your coffee + water here: Coffee Brewing Calculator
- If your bloom looks too bubbly, too flat, or your drawdown feels off, dial in grind here: Coffee Grind Size Finder
- If you struggle to wet all the grounds evenly (dry spots during bloom), a controlled pour helps: Best Pour Over Kettle
- If you want hands-off consistency on busy mornings, these machines can handle the pour pattern for you: Best Automatic Pour Over Coffee Maker
How we know
- We used a clear, common definition of bloom: the first stage of pour over when water hits dry grounds and CO₂ releases.
- For beginner bloom settings, we used a coffee-industry guide that gives 1:2 to 1:3 bloom water and 30–45 seconds as a typical bloom window.
- For why bubbles happen, we leaned on coffee science showing roasted coffee contains CO₂ and that grind size affects how quickly CO₂ escapes.
- For practical storage and freshness context, we used SCA material explaining how heat and other factors affect freshness and degassing.
- For “safe” brew water temperature range in filter-style testing, we cited a published protocol that references 92–96°C in ECBC/SCA Gold Cup testing.
References
European Coffee Brewing Centre. (2020). Certification standards grinders. https://ecbc.no/overview/domestic/certification-standards-grinders/
Specialty Coffee Association. (n.d.). Preserving freshness: A race against time (25 Magazine, Issue 4). https://sca.coffee/sca-news/25-magazine/issue-4/preserving-freshness-race-time-25-magazine-issue-4
Wang, X., Lim, L.-T. (2014). Effect of roasting conditions on carbon dioxide degassing behavior in coffee. Food Research International. https://www.semanticscholar.org/paper/Effect-of-roasting-conditions-on-carbon-dioxide-in-Wang-Lim/7d740c465e60135ad9be9d4ab85753e2a7812b71